Hello and welcome to The Compost Bin. I'm Compostwoman and I live with my family in rural Herefordshire. We have nearly four acres of garden and woodland, all managed organically and to Permaculture principles, which we share with Chickens, Cats and assorted wildlife. We also grow a lot of our own food, run courses in all sorts of things and make a lot of compost!

I am a Master Composter and have spent more than a decade as a volunteer Community Compost adviser with Garden Organic and my local Council.
I'm a self employed Environmental Educator so I run workshops and events where I talk about compost, veg growing, chicken keeping, cooking, preserving and sustainable living. I also run crafts workshops and Forest School/outdoor play sessions in our wood.

We try to live a more self sufficient lifestyle here, as best we can, while still having a comfortable life and lots of fun.


To learn more about us click on the About Compostwoman tab and remember to click on the photos to make them full size!


Thursday, 12 March 2009

Growing Potatoes and Jerusalem artichokes

Potatoes

To avoid introducing pests and diseases into your crop, buy good quality, certified seed potatoes and start 'chitting' them as early as possible. This process encourages the tubers to produce strong, sturdy sprouts and gives an earlier maturing crop.

This is what you do:

Store the seed tubers in a light, cool (10°C), frost free spot and leave them to sprout. This is known as chitting. Place the tubers rose end up (the end where the tiny buds can be seen), in a clean box or tray. An egg box would be ideal, or a fruit tray from a supermarket ( the thick card ones are good!)

If you have more than one variety, label the box ( :-) )

Keep in a cool dark place.

When you see tiny shoots appearing move the tubers to a cool (8-10°C), light place.

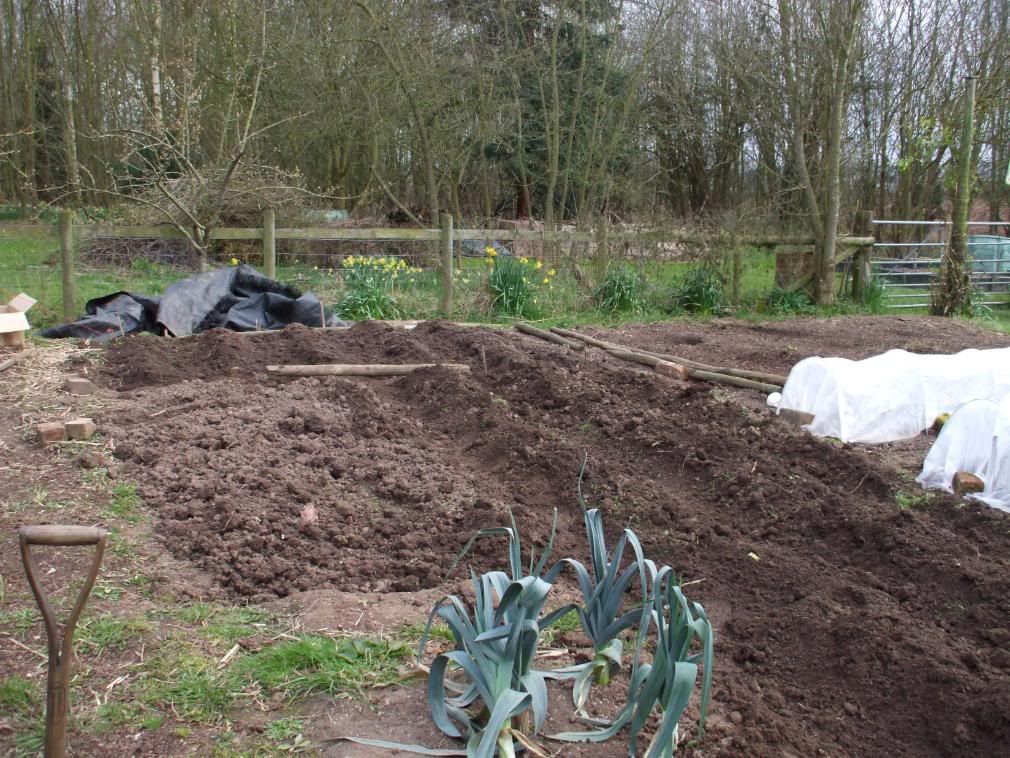
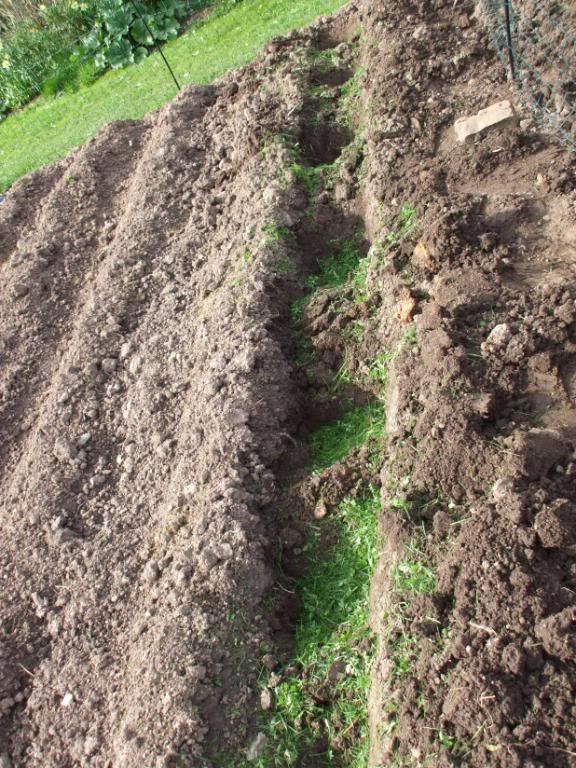
Potatoes in the ground.

Dig in well-rotted manure or garden compost (apply no more than one wheelbarrow-full of well-rotted strawy manure, or two of compost, per 10 sq metres of ground) Plant tubers into trenches or in individual holes, 7-15cm in depth, cover with soil. See spacings below:

I make a shallow trench and then dig a hole for each tuber in the trench, this gives me soil to earth up the growing plants as required.

I use a shovel of my home made compost in each of the holes with a tuber in, plus a scoop of wood ash and a scoop of organic "Rooster" chicken manure (available from the Organic Gardening Catalogue).

1st early – 28-36cm apart, 38-50cm between rows.
2nd early & maincrop – 36-45cm apart, 65-75cm between rows.

Potato planting can start from mid March in milder areas, where frost is rare. If the soil is slow to warm, wait until April or May, or protect early plantings with fleece or cloches.


So I have been very busy planting spuds, as we are now into a waning moon!
I have already got the Earlies (Orla , Coleen) in the ground and I got 2 rows of Early Maincrop in this afternoon...a really nice waxy salad potato called "Nicola" which we have found keep as Maincrop really well.


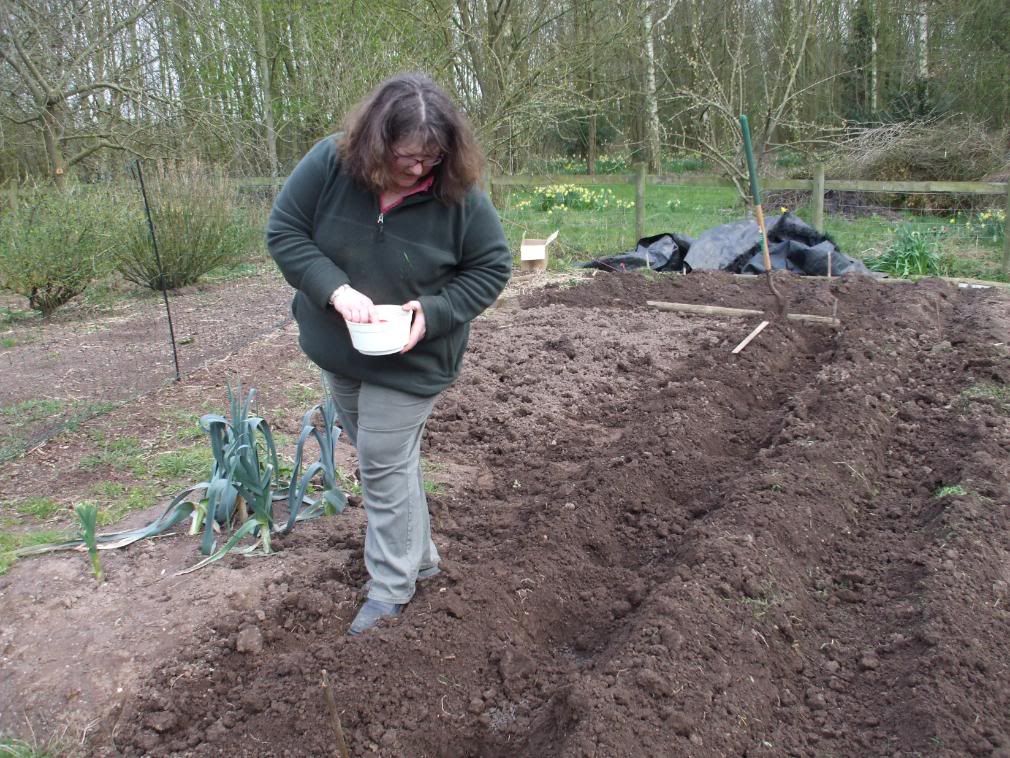
Compostman dug over the ground for me and then I made some trenches and dropped each spud in a hole in the bottom of the trench, with some organic chicken poo pellets, wood ash and some grass clippings (they help prevent scab)


I then tucked the spuds up nice and warm with a good covering of soil....


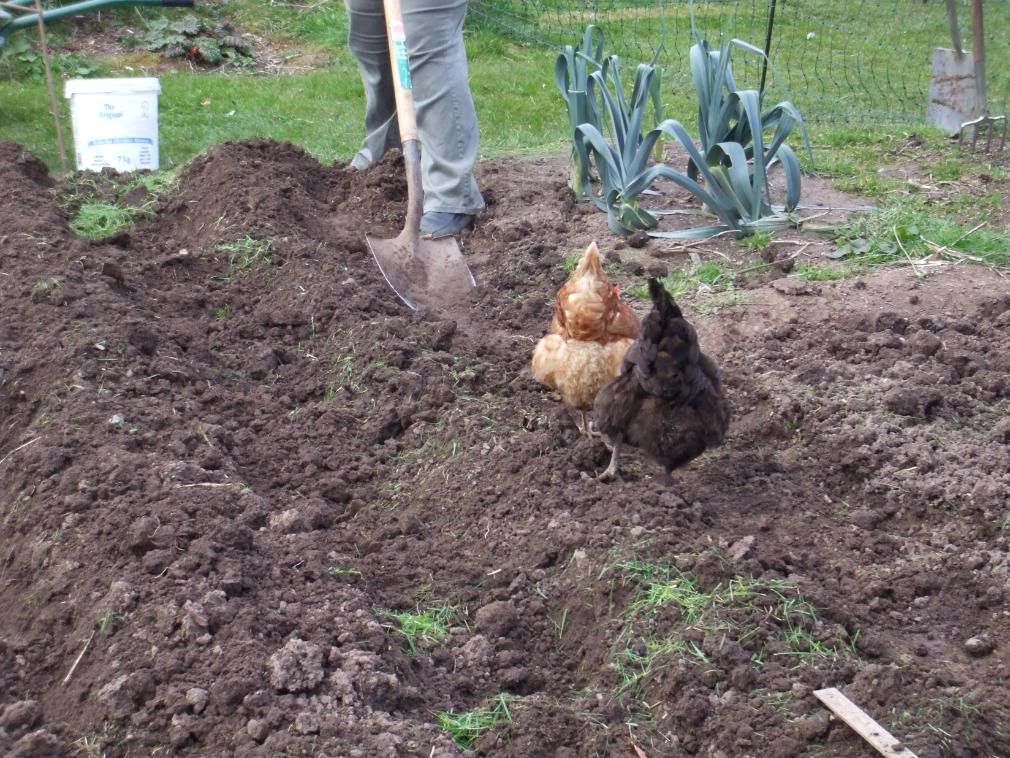
Unfortunately Henny and Ginger thought all this was purely for THEIR benefit and came along


and rather destroyed my nice earthing up ridges of soil in between the trenches, but hey ho...never mind...I can rebuild them. The chickens are meant to be fenced out of the area of the veg plot but someone left the gate open....


Every year we grow enough spuds to last us from late June/early July until the following May... so we only buy potatos for about a month or so every year.

But in 2007 we lost virtually all our Maincrop harvest to blight (oh what a suprise, after all the wet weather we had!)

We had to start buying potatos in October!!

2008 was a bit better, because we had good weather in Feb and March I got the earlies and 2nd Earlies in, well..... early ;-)

so when the blight hit again, we had a good crop to harvest, which stored well.

So this year I am growing a lot more 2nd early varieties and only a few maincrop varieties and they will be in bags and tubs away from the veg plot so if blight DOES hit us I can keep a physical distance between the maincrop and the potato patch.

I am really hoping that, this year

a) The weather is better
b) Getting them in a bit earlier will help if we DO get blight again
c) I have spaced the rows out even further AND left a larger gap between each spud within the trench, so hopefully more air can get in between the potato plants.
d) I am not growing maincrop varieties which need a longer growing season to mature and so are worst affected by blight.

Fingers crossed!! That all this will help and once again we will have a decent harvest.


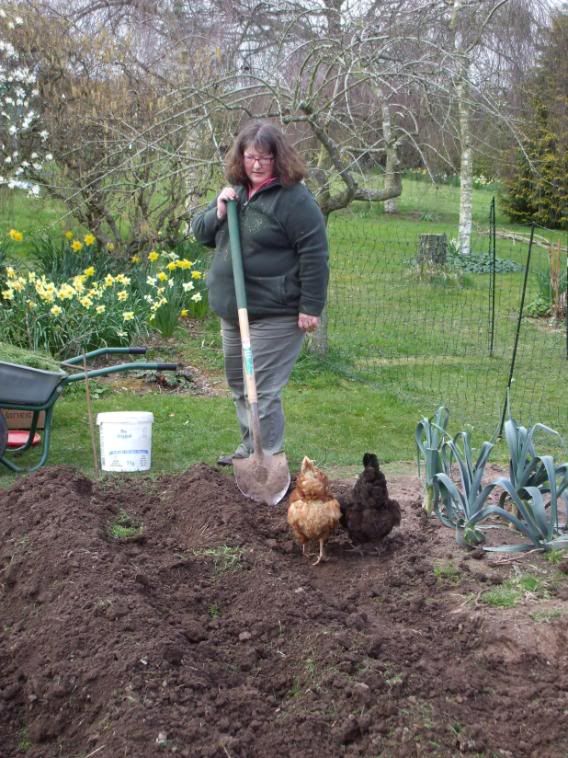
BUT We have put a 50 m length of electric fence netting around the veg garden so the hens cannot get in to dig everything up...

and they were VERY miffed that they couldn't get in to flatten the potato ridges I have made HOWEVER hard they tried!!


Potatoes are very tolerent so IF you have some earlies or early maincrop I WOULD get them in the ground or a grow bag NOW....even if they don't have big shoots on them....


Potatoes in grow sacks.

But what do you do if you don't have space in the ground?

You grow spuds in bags or pots, thats what!

To get an earlier crop I planted these in Feb on a waning moon. If you have a sheltered place you will get an earlier crop by doing this, up to 4 weeks earlier. Mmmmm new potatoes and butter


Jerusalem Artichokes

They are grown in the same spot each year, for if you miss a tuber it will grow like a volunteer potato, so prepare the ground well with plenty of manure which you can top up as a mulch in winter. Be careful where you site them, the foliage easily reaches 2 metres and 2.4 metres is common. The stems are quite delicate and you will need to provide support with stakes and string in windy locations.

Plant individual tubers about 40 to 60cm (15" to 24") apart around 12cm (4" to 6") deep in early spring and in a few weeks the shoots will appear. If you have more than one row, allow 75cm (30") between rows. When they reach about 30cm (12") high, earth up a little as for potatoes.

They are quite a productive crop, 3kg from one plant is typical so you don't need many seed tubers.


Wednesday, 11 March 2009

What I am planting now - March


I AM aware I did say I would post about planting seeds and how to do it, so here is the first in a series. It is what I have been doing for the last few weeks, and it is all still relevant to do now!

Things I am either sowing, have just sown or am planning to sow very soon.

When soil and growing conditions are right, it is time to sow vegetables! A good indication that it is time, is to look at your lawn:- if the grass has started to grow the soil temperature will be above 5-6 degrees centigrade and you can sow/plant hardier seeds direct in the ground, or plant out tubers such as potatoes.

BUT If you have a heavy clay soil wait!. Seeds sown in wet or cold soil tend to rot and die. Waiting for a few more weeks won’t hurt, ( honest!)

A black or clear plastic covering over soil will warm it up, so you can sow some seeds outside a little earlier than usual. Spread plastic sheeting over the areas where you plan to sow the seeds. Weigh down the sides so it can't blow away in winter winds. After 3 - 4 weeks, the soil should be warm enough for seed sowing. I use big sheets of Geotextile ( weed sheet) which we have a huge roll of, so we have 4 sheets which cover the 4 plots in the veg garden all winter. We turn them back to let the weed seeds germinate in Jan, then cover the weeds up to kill them off ready for digging and planting in March :-)

I am sowing now outside in ground

BUT in beds warmed up by geotextile cover and covered by fleece/cloche after, so you need to allow for my soil being quite warm and the seeds being protected after!

Broad beans (see separate post)

Parsnips (see separate post)

Radish
Turnip
Early carrots
Kohlrabi


Plant outdoors

Potatoes (see separate post)

Jerusalem Artichokes(see separate post)


Outside sometime soon, when I think its warm enough for them! plant on a waning moon

Shallots
Onion sets

I am currently sowing in trays and modules

Raising plants to transplant outdoors (or under cloches or in a greenhouse/ tunnel) gives you a head start on the season. It is simple to provide extra warmth for a few pots and trays of seeds - in a warm room, or on a heated bench for example. But remember - the seedlings that appear will also need some warmth and good light levels, until they can be moved to a frost free final position, so allow for where you are going to keep them. I have had a lot of success with a cold frame inside an unheated polytunnel and this would work just as well inside a conservatory or a plastic small greenhouse I think.

Inside in heated propagator
( see separate post)


Tomatoes/Peppers/Aubergines - for growing on in a cold greenhouse or tunnel
Herbs and salad leaves (all during the March waxing moon)

Outside in PT

Potatoes in grow sacks ( see separate post)

To get an earlier crop! I planted these in Feb on a waning moon. If you have a sheltered place you will get an earlier crop by doing this, up to 4 weeks earlier. Mmmmm new potatoes and butter...mmmmm

Brussels sprouts - for early crops
Early cabbage
B Beans in pots
Summer cabbage
Spring onions
Lettuce,(winter hardy varieties)
Leeks for transplanting ( I sow the autumn ones now, the winter ones in a months time)

Kohl Rabi - best sown in modules for transplanting
Celeriac - best sown in modules for transplanting

Sowing Leeks
Wait till early to mid-spring before sowing leek seed, depending on the weather. They can either be sown in a seed bed for transplanting the following summer, sown in trays/pots, or sown in their permanent positions. If you sow in a seed bed you have the added bother of transplanting, but this must be balanced out by the fact that if they are sown in their permanent position, they will take up a lot of space for a long time before producing results

I always sow seed in pots and then transplant.


A general note

Silly though this may sound, plant stuff you know you want to eat! Also, decide what you like and if space/time is limited, grow the stuff which is most expensive to buy. So, if you LOVE salad leaves and herbs, grow lots of them! If your favourite thing is new potatoes then grow lots of them!

It is much better to grow the veg you really really love, and eat lots of it, fresh and straight from your garden, than feel you "have" to grow beans, peas, onions or whatever....and then not want to eat it.

We grow lots of stuff, because we are trying to feed ourselves for most of the year!. Unless you have the time, space and inclination to do this, DON'T!

I used to grow new potatoes, salads, herbs and mange tout in our tiny garden in Worcester, ...and sprouts, leeks and carrots in winter because thay were the veg I loved to eat fresh from the garden

Also if you don't want to plant by the moon phase, or did but missed the correct phase, I wouldn't worry! I personally feel it gives a better yield BUT was planting stuff as and when for years and it didn't seem to matter too much ;-)

Look out for the posts mentioned above as they will follow on soon.


Hope this helps! I haven't been very well recently and am still a bit muddle headed and feeble, so I really hope you can understand what I am *trying* to say here.....

Saturday, 7 March 2009

Sad news.


As some of you may recall, I mentioned in my Feb Chickenailia roundup post that Genghis Hen was poorly. Last Sat I had to treat her for sour crop and her abdomen was very swollen with egg peritonitis. This is something she has had for some time, it is something which is sadly common in ex battery hens due to their egg laying equipment being damaged by the excess number of eggs they are stimulated to lay.

Although she was OK during this last week and yesterday, this morning during my normal morning check of the hens (I let them out and stand there for about 10 mins with a mug of tea watching them while they eat some food and say hello to me...)I became quite concerned about her condition. She didn't look bad, exactly,..... but chickens mask how poorly they are (as a protective move) and so I just trusted my instincts that she wasn't looking as she had been earlier in the week. SOMETHING looked wrong, somehow... even though I knew she wasn't in the best of health anyway...

So I went inside and I called the vet and made an appointment for later today. My instinct was warning me that Cathy, too, wasn't quite right, she just looked a bit "off colour" to me, nothing obvious but.....so I took her down as well. Cathy is my other ex battery hen and is the same age and from the same place as Genghis.

Sadly, when I got in to the vets, Genghis Hen was found to have a high temperature, had obviously lost a lot of weight since Thursday evening (the last time I picked her up and cuddled her)and seemed to have a lump inside her which could be felt by internal examination, although she was not egg bound...Tamsin the lovely vet and I had a chat and decided that Genghis probably had a tumour ( or several) and the peritonitis and sour crop were secondary symptoms due to that. As Genghis was obviously poorly and had been poorly several times recently and then recovered (but each time she had gone down in condition a bit,) that the kindest thing to do would be to put Genghis to sleep there and then, which Tamsin did. Genghis Hen slipped into a permanent sleep while I stroked her feathers and told her what a good hen she had been.

And I was right to be worried about Cathy, she WAS slightly poorly, she was beginning to run a temperature and had a slightly rattly chest, so she is on antibiotics and I am watching HER for egg peritonitis as well....

So I came home and we made up a pen for Cathy and I then scrubbed out the Broody Ark (where Genghis had been living recently) the Eglu, all the feeders and drinkers, and inside Cluckingham Palace. And I MEAN scrubbed and sprayed with sanitiser as well as all the bedding and Aubiose removed and replaced..

I did this to be on the safe side, so as not to transmit any germs to the others. I don't think for a moment that Genghis died of anything contagious but Cathy DOES have a potentially contagious infection and I just felt happier cleaning everything.

Cathy is now in the clean, scrubbed out Broody Ark, inside a separate bit of fencing netting so she is away from the rest of the chickens but can still see them and be near to them. She will have to be dosed orally with antibiotics every day for the next week.

Everybody else has a very clean house (much more so than a normal clean!) and tomorrow I shall clean out all the runs as well. ( I ran out of daylight tonight.)

Genghis has been buried on the edge of our woodland, with some flowers placed on her grave by Compostgirl.

I feel very sad that Genghis is dead, I feel I should have done even more for her and somehow "made her better" even though I KNOW she was ill and I gave her the very best care that I could. I keep reminding myself I gave her a wonderful life for the last year and she was due to be killed a year ago, and got an extra year of life with us. BUT I still feel I failed her somehow.

I admit, took some time to warm to her and on several occasions (as you may remember me posting) I came close to dispatching her myself, especially when she was bullying everybody and eating eggs! and messing up the nest boxes daily with her pecked eggs.... She only laid a few misshapen eggs herself and she pecked her feathers out terribly BUT she was a challenge and I persevered with her and in the end she was a delightful hen, friendly, companionable and a very good "guard hen" to all the rest of the flock.

I know she ate the food I bought but gave me no "return" in egg form ( and I have had my continued toleration of her questioned because of this) , BUT she gave me a huge return in other ways. She taught me a lot, about looking after ex battery hens, about hen behaviour in general AND about patience and about seeing good things even in a bad situation.

I shall miss her following me around and chatting to me as I dig the garden. I shall miss her wanting to get in the Compost bins at any opportunity. I shall miss her invading the kitchen and pooing on the carpet and eating the cat food and terrorising the cats...

RIP Genghis Hen, you will be missed by all of us.

Thursday, 5 March 2009

Eco Club - Paper making fun

well, recycled paper making... :-)

We made paper from recycled paper last week at Eco Club so I thought you might be interested to see how I do it and what preparations I make.

Recycled paper making is fun, but very messy!

I have built up a list of useful equipment over the 3 years I have been doing this, just to be able to do it in the most easy manner. Remember I am doing this with between 15 and 30 children, so I have extra sets of everything!

Paper making kit


Lidded bucket (to make and transport pulp)
Old laminated floor tiles (useful flat surface to roll out on)
Rolling pins
Cloths
Jugs (useful to scoop out pulp)
Stick blender or masher
Spoons (for adding/mixing pulp)

Mould and Deckle (you need to make (or buy) a mesh frame (sometimes called a mould) and an outer frame without mesh (called a deckle) Two picture frames and a piece of mesh stapled on to one frame would work.

Sponges (for removing excess water from pulp)
Trays (bigger than the mould and deckle, for the actual paper making part. I use unused plastic cat litter trays)
Newspaper
Aprons
Plastic tablecloths


My Paper making kit ready to go to Eco Club, all stacked in a big plastic box in the boot of my car, paper pulp in SEALED buckets (formerly had bird food in them, washed and reused for this), standing in the paper making trays. If pulp spills it is VERY hard to clean up!

To make the pulp

Take cut or better still shredded white office paper (printed is fine, but good quality office paper makes the smoothest recycled paper)

Many other types of paper that can be used include: Newspaper (If you want a grayish colored paper), old magazines, old cards (makes heavier paper) tissue paper (for finer paper)


Put a generous quantity of torn or shredded paper into a bucket and add warm water. Leave overnight if possible to let the paper absorb lots of water - this makes the fibres easier to break up. If you need to speed this process up you can add boiling water.


Liquidise or mash the wet paper until it is pulp. I find putting half the pulp in another bucket with some more water is best to liquidise it, if the pulp is too thick it is hard to liquidise.


It will look like porridge when it is ready.


Wash your hands after handling paper pulp as it is alkaline and can leave your hands very dry, and remind the children to wash their hands as soon as they have finished doing the pulp handling bit.


To make the paper


There are several ways of doing this, I put the mould and deckle in water (frame mesh side up, deckle on top)


and then spoon/pour pulp into the frame until I have enough. This is easier for children to do!


OR you can put some pulp in a bowl (bigger than your frame and deckle) with water.
Take the frame and deckle, hold them firmly together and scoop them under the surface of the pulp mixture until you have picked up enough pulp from the water to make an even layer of pulp on the mesh. This makes finer paper but is hard for children to do!

If you want to colour the paper add food colouring to the water at this stage.

Agitate the frame and deckle in the water to get an even layer of pulp inside the deckle, on the mesh. You can spoon some pulp into the deckle and frame to fill in any holes.


When all of the mesh is evenly coated lift out and allow the frame and deckle to drain, keeping level.


At this point you could add glitter, dried leaves, herbs, flowers, scraps of coloured tissue paper etc. I add some vanilla food flavour for a lovely scent, or a drop of lavender essential oil, or some dried lavender also looks very attractive.


Lift the deckle off,


place a cloth (I use old j cloths, anything absorbent will work) over the paper on the mesh of the frame. Gently dab with a sponge to remove the worst of the water.


Carefully lower the cloth and paper, cloth side down, on to a flat surface (I use an offcut of floor tile) covered with newspaper/cloth to absorb water. There WILL be a lot of water around!


You now have the cloth on the tile, the paper next then the mesh of the frame. This is the back surface of the paper, seen through the mesh.


Press down with sponges on the mesh, so the water is blotted off the paper through the mesh.


THEN

Lift off the frame from one corner, pressing gently from the mesh side as you go, leaving the paper behind on the cloth


You now have a cloth with some paper on top of it!


Put another cloth on top and roll with a rolling pin to remove any further water (and flatten the paper a litle.)


Repeat whole paper making process, adding each cloth to the stack.

When you have enough paper sheets, place something flat on top ( I use another laminated floor tile) and weigh it down to flatten the paper stack. Leave for a bit (a few hours if possible but it is not too critical).

Peel apart the cloths and leave each sheet of paper and cloth to dry out a bit more if needed.

Restack and put a weight on the stack to flatten the sheets

Finally peel off the cloths and leave the paper to dry out completely. DO NOT put in too hot a place or the paper will buckle as it dries!

I get the children to work in pairs, each one working on an end of the frame and then the sheet can be cut in half when dry. Odd bits can be re used to decorate other sheets of paper.

Put in a warm dry place to dry and make sure you know who made it!!


,


And THAT is how we made paper!

Wednesday, 4 March 2009

Spring colours!


As a result of some requests (you know who you are!)

some spring flower pictures from our garden.

Enjoy!
UA-40361266-1