How to make a twig heart.
1. Take 2 twigs of roughly the same length (around 30cm or longer).
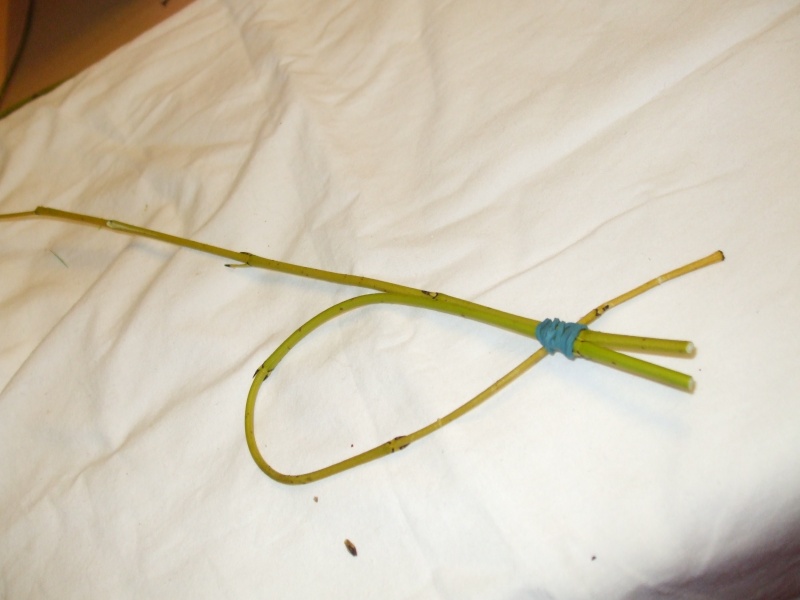
2. Fasten them together at the bottom, thickest end. (Using an elastic band first makes it easier to tie them )
3. Take 1 of the twigs and bend it part way along, and down. This is the curve of the heart and sets the size of heart you will make. Fasten the thin end into the elastic band holding the thick ends of the twigs together.
Enlarge this imageReduce this image Click to see fullsize
4. Take the other twig and bend it part way along, and down in the same way, fastening the thin end into the elastic band holding the thick ends of the twigs together.
Enlarge this imageReduce this image Click to see fullsize
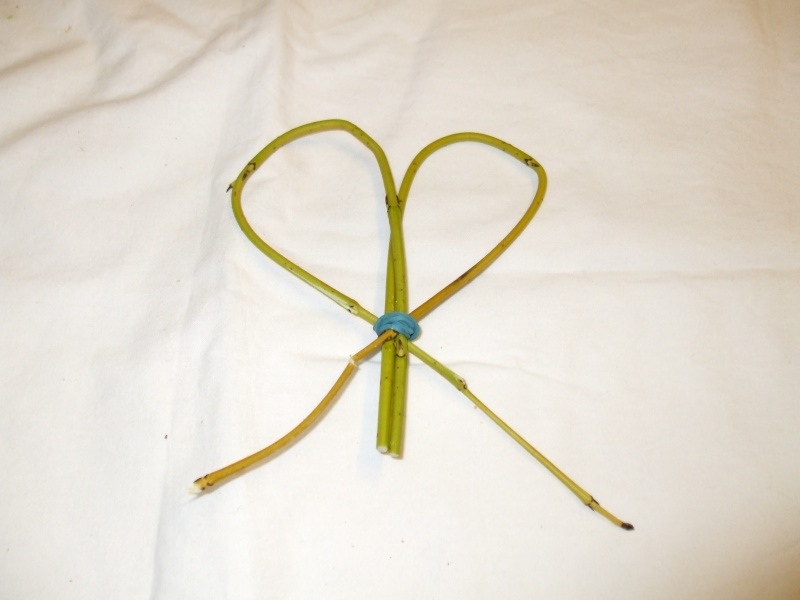
5. You now should have a heart shape!
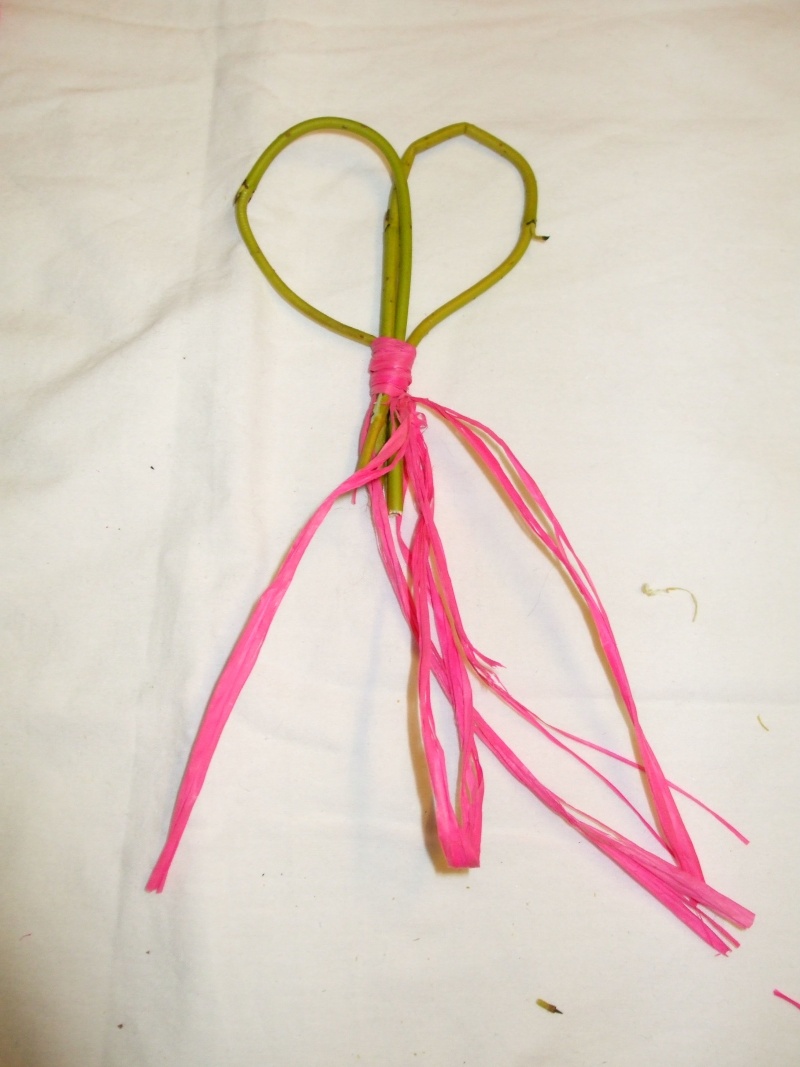
6. Adjust the shape of the heart until it is how you want it, then tie the thick and thinner ends together with your choice of ribbon or raffia. Trim the ends of the twigs to your desired length
Enlarge this imageReduce this image Click to see fullsize
Variations
1. Take 2 bundles of 3 twigs, all roughly the same length. A mix of green and red is very effective.
2. Tie them together at the bottom, thickest end. (Use an elastic band first, to make it easier)
3. Take 1 of the twig bundles, plait the 3 twigs in that bundle before continuing as above in step 3.
4. Repeat the plaiting for the other twig bundle, before continuing as above in step 4.
5. You now should have a heart shape, with each half made of the 3 twigs plaited together.
6. Adjust the shape of the heart until it is how you want it, then tie the thick and thinner ends together with your choice of ribbon or raffia.
OR just use 2 bundles of equal length dogwood and make a heart as if using 2 twigs.

No comments:
Post a Comment
Hello! Thank you for reading my blog and for commenting. I try to reply as quickly as I can and I really appreciate your interest in my life and doings here in The Compost Bin.