Salt dough crafts
The art of making objects using salt dough has become very popular in recent years with the only requirements to get started in this folk art hobby are flour, salt, water and basic equipment found in the kitchen. This is how I do it and how I teach others to do it at my craft workshops
Things you need
a baking tray (covered with a thin layer of butter/oil to stop the decorations sticking)
paints and brushes (you can mix the paints with some pva glue)
a cocktail stick (for making the hole in the decorations)
A bowl to mix your dough
A rolling pin for producing smooth sheets of dough
Toothpicks or a small pointed knife for cutting and indenting details
An assortment of pastry cutters and moulds for decorative shapes
Basic Salt Dough
2 Cups of Plain Flour (not self-raising)
1 cup Fine grained plain salt
1/2 cup water at room temperature
Veg oil ( opt.)
Mix the salt and flour in a large bowl and then add the water. Knead the mixture for about 5-10 minutes until it becomes smooth and elastic. (The addition of 1-2 teaspoons of vegetable oil improves suppleness of the dough making it easier to work with). Cover with cling wrap to stop the dough drying out and let the dough sit for 30 minutes before using.
The dough is now ready to use. Fresh dough is best for modelling. However, if you find you have any leftover dough it can be wrapped in cling wrap or an airtight container and stored in a cool place for a few days.
When finished and happy with your results you can air-dry or bake your project in the oven.
MAKE SURE YOU MAKE A HOLE IF YOU WANT TO HANG IT UP!!
Ensuring your projects are correctly dried ensures they will last a long time so it is important that this is not hurried. Air-drying is suitable for flat, small pieces or for coloured pieces where baking will alter the colour of the finished project. Oven drying is the most popular method and requires careful attention to accurate temperature control to avoid burning. Bake for approx. 2 hours using a low temperature setting 50-70C for the first half hour then increase temperature slowly to 90-100C and cook until the piece is uniform in colour.
The dough is cooked when it hard and sounds hollow when tapped. Turn the oven off and leave in oven until cool. Any burns can be sandpapered off with fine- medium grade sandpaper. An emery board or small file can be used for delicate or intricate sanding on objects.
When thoroughly dry sand any imperfections. At this stage you can paint your projects then seal with a final coat of varnish. Your finished projects can be left unpainted but they must be sealed on all sides (including underneath) with varnish, gloss or matt, for protection otherwise they will not last long when exposed to air.
Using a polyurethane varnish on food coloured models instead of water- based varnish helps to intensify the colour.
Also, for the more impatient or short of time...
Microwave Salt Dough recipe
4 cups of flour
1 cup of salt
1-1/2 cups of hot water
Directions:
Roll the dough thinly. Using a microwave-safe plate (not paper or cardboard), microwave a plate of your ornaments for 1 to 4 minutes, increasing the time by 1 minute increments and keeping a close eye on the microwave as the ornaments bake. Suggestions are to cook on High, but I have found medium or low, and slowly, gives the best result. Too rapid baking causes the objects to bubble up and distort. You also don't want to risk a fire! Let the ornaments cool completely before decorating, as before.
I have tried both of these recipies, the microwave one didn't work for me at all.
After making and drying out.
Enlarge this imageReduce this image Click to see fullsize

After painting with acrylic paint, seen hanging on our tree.
Enlarge this imageReduce this image Click to see fullsize

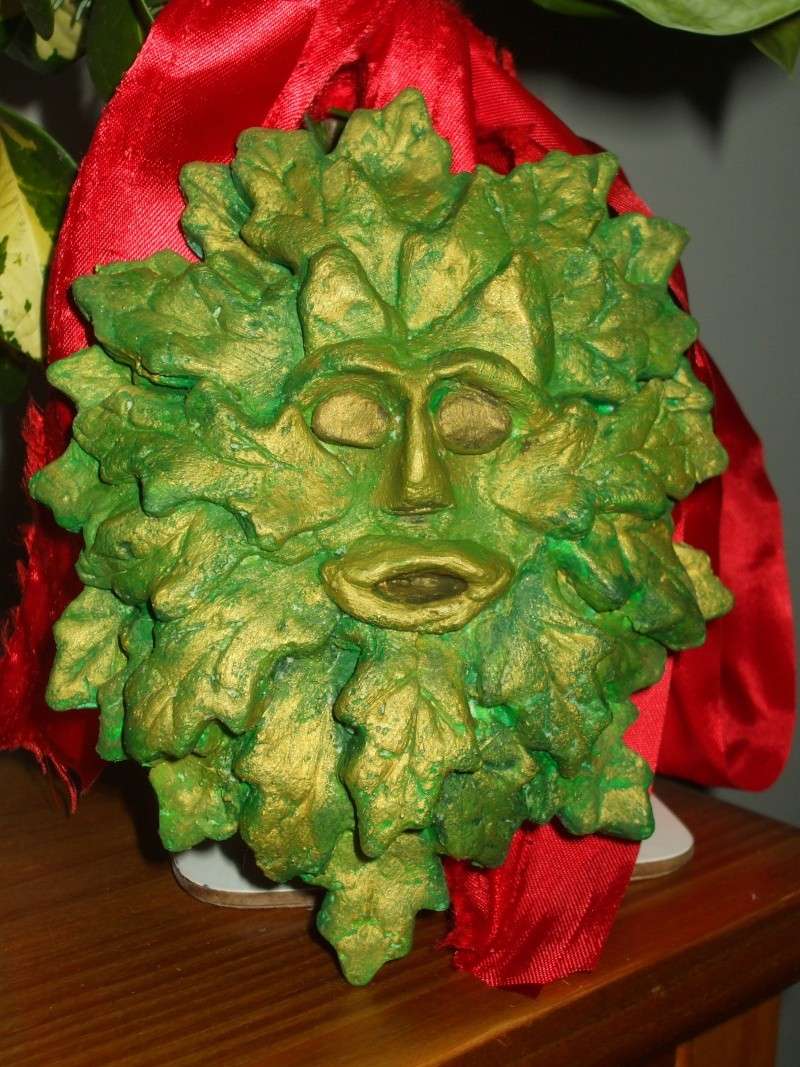
A Green Man I made last year.
Enlarge this imageReduce this image Click to see fullsize
The art of making objects using salt dough has become very popular in recent years with the only requirements to get started in this folk art hobby are flour, salt, water and basic equipment found in the kitchen. This is how I do it and how I teach others to do it at my craft workshops
Things you need
a baking tray (covered with a thin layer of butter/oil to stop the decorations sticking)
paints and brushes (you can mix the paints with some pva glue)
a cocktail stick (for making the hole in the decorations)
A bowl to mix your dough
A rolling pin for producing smooth sheets of dough
Toothpicks or a small pointed knife for cutting and indenting details
An assortment of pastry cutters and moulds for decorative shapes
Basic Salt Dough
2 Cups of Plain Flour (not self-raising)
1 cup Fine grained plain salt
1/2 cup water at room temperature
Veg oil ( opt.)
Mix the salt and flour in a large bowl and then add the water. Knead the mixture for about 5-10 minutes until it becomes smooth and elastic. (The addition of 1-2 teaspoons of vegetable oil improves suppleness of the dough making it easier to work with). Cover with cling wrap to stop the dough drying out and let the dough sit for 30 minutes before using.
The dough is now ready to use. Fresh dough is best for modelling. However, if you find you have any leftover dough it can be wrapped in cling wrap or an airtight container and stored in a cool place for a few days.
When finished and happy with your results you can air-dry or bake your project in the oven.
MAKE SURE YOU MAKE A HOLE IF YOU WANT TO HANG IT UP!!
Ensuring your projects are correctly dried ensures they will last a long time so it is important that this is not hurried. Air-drying is suitable for flat, small pieces or for coloured pieces where baking will alter the colour of the finished project. Oven drying is the most popular method and requires careful attention to accurate temperature control to avoid burning. Bake for approx. 2 hours using a low temperature setting 50-70C for the first half hour then increase temperature slowly to 90-100C and cook until the piece is uniform in colour.
The dough is cooked when it hard and sounds hollow when tapped. Turn the oven off and leave in oven until cool. Any burns can be sandpapered off with fine- medium grade sandpaper. An emery board or small file can be used for delicate or intricate sanding on objects.
When thoroughly dry sand any imperfections. At this stage you can paint your projects then seal with a final coat of varnish. Your finished projects can be left unpainted but they must be sealed on all sides (including underneath) with varnish, gloss or matt, for protection otherwise they will not last long when exposed to air.
Using a polyurethane varnish on food coloured models instead of water- based varnish helps to intensify the colour.
Also, for the more impatient or short of time...
Microwave Salt Dough recipe
4 cups of flour
1 cup of salt
1-1/2 cups of hot water
Directions:
Roll the dough thinly. Using a microwave-safe plate (not paper or cardboard), microwave a plate of your ornaments for 1 to 4 minutes, increasing the time by 1 minute increments and keeping a close eye on the microwave as the ornaments bake. Suggestions are to cook on High, but I have found medium or low, and slowly, gives the best result. Too rapid baking causes the objects to bubble up and distort. You also don't want to risk a fire! Let the ornaments cool completely before decorating, as before.
I have tried both of these recipies, the microwave one didn't work for me at all.
After making and drying out.
Enlarge this imageReduce this image Click to see fullsize
After painting with acrylic paint, seen hanging on our tree.
Enlarge this imageReduce this image Click to see fullsize
A Green Man I made last year.
Enlarge this imageReduce this image Click to see fullsize
_________________
Thank you so much for posting this! I will be trying this over the weekend with my girls!
ReplyDeleteI hope you really enjoy it with them Kelly
ReplyDelete