As a Master Composter promoting composting in Herefordshire, on behalf of the Council and Garden Organic, I get asked a lot of questions about how to make compost and what to do with it.
So, in honour of it being Compost Awareness Week, I am going to post ( again) about composting :-)
In this post I am going to talk about how *I* make compost. I will mainly talk about the "Hot" composting method, as that is how I usually make compost. The "Hot" method involves taking lots of material and filling up a compost bin or building up a compost heap in one go. Within a few days, the heap is likely to get very hot to the touch. When it begins to cool down, or a week or two later, you can "turn" the heap. Remove everything from the container or lift the container off and mix it all up, trying to get the outside to the inside. Add water if it is dry, or dry material if it is soggy. Replace in the bin. You could add a lot more material ( if available) at this point.
The heap may well heat up again; the new supply of air you have mixed in allows the fast acting aerobic microbes, ie those that need oxygen, to continue with their work. You can do this several more times if you have the energy, but the heating will be less and less. When it no longer heats up again, leave it undisturbed to finish composting.
The "Cool" method is where you add bits and bobs of compostable material over a longer period of time; it works just as well but takes longer and tends to work best in the summer. It doesn't reliably kill seeds in the same way as the Hot method because it doesn't heat up to a high enough temperature over the total volume of the material. When the container is full - which it may never be as the contents will sink as it composts down - or when you decide to, stop adding any more. Then either just leave it to finish composting (which could take up to a year) or turn it to get more air in and make the fast acting aerobic microbes start to work again.
Whichever method you use, make sure that the contents of your bin or heap is not too dry and add water if in doubt. A good sign that it is too dry is the presence of ants in the mixture.
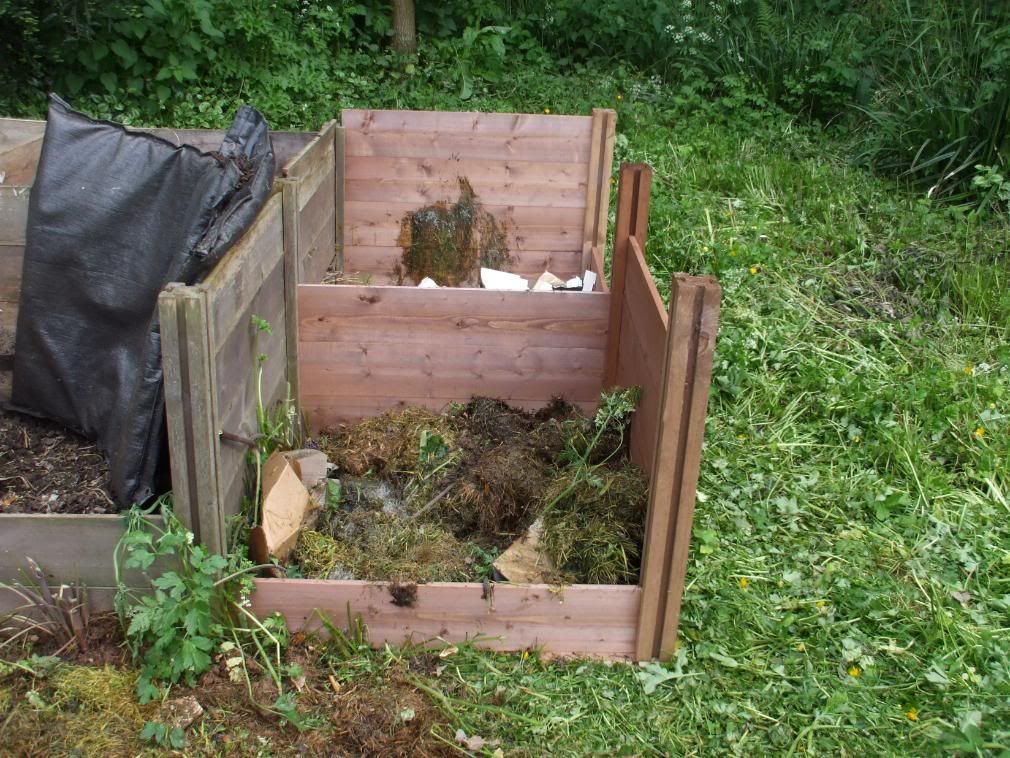
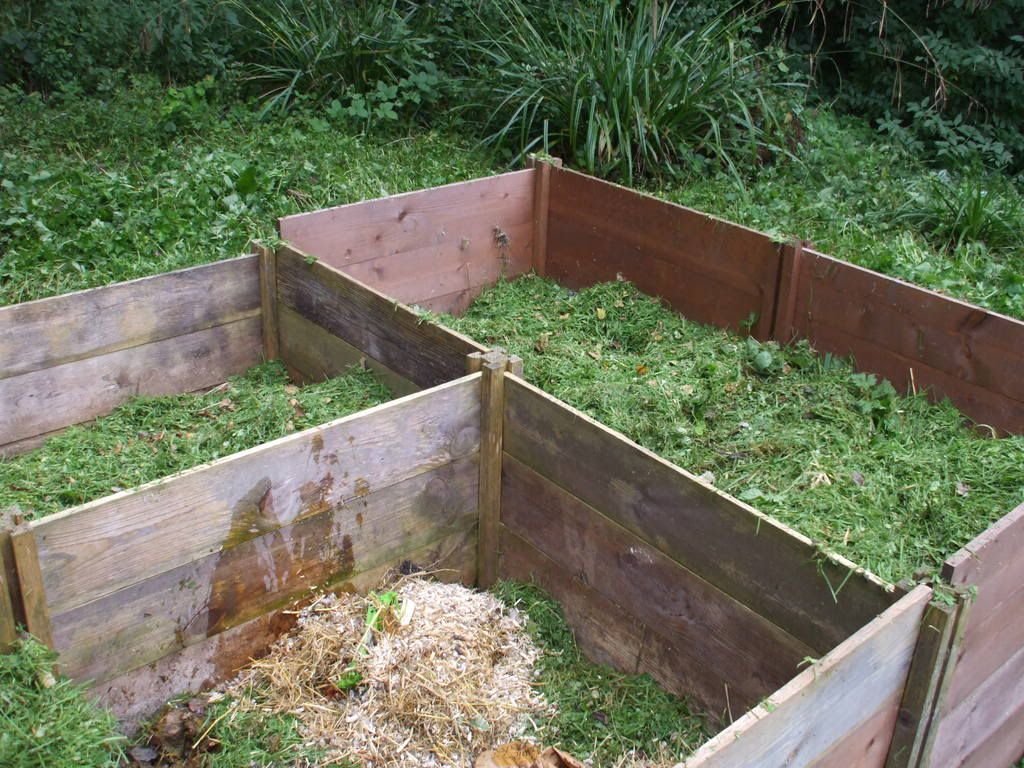
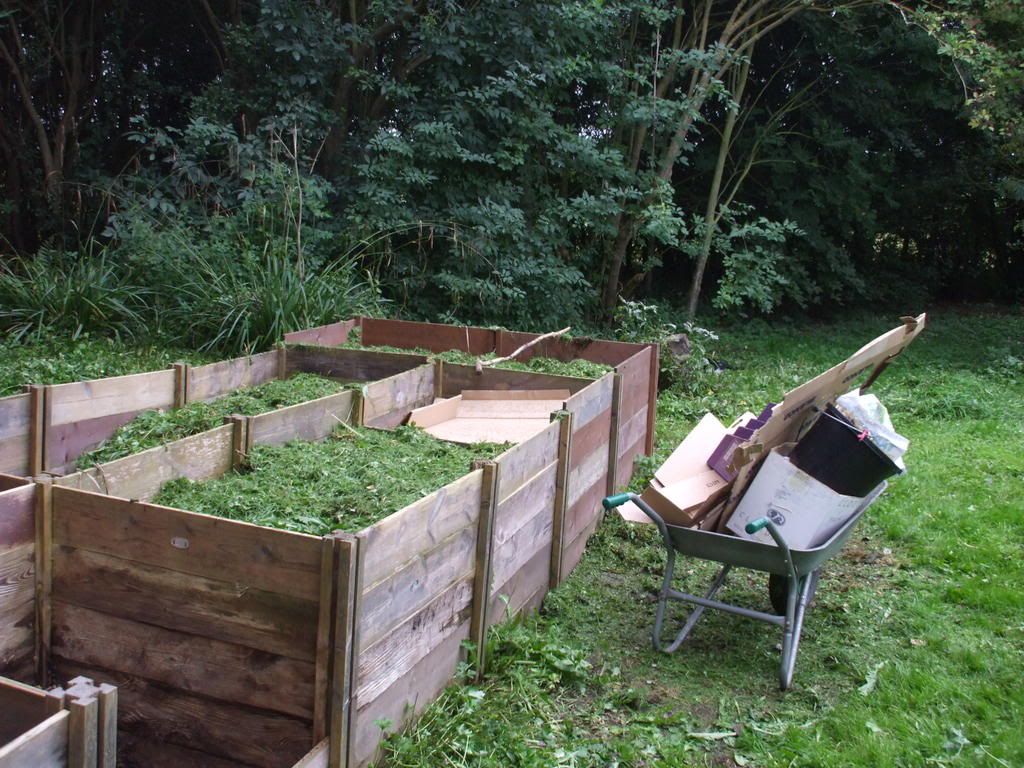
As you can see from my photos, I use a variety of different bins and have made compost heaps in the past. Bins are good as they allow the material to be contained in one place, and I can also vary the contents to produce different sorts of compost. I have bins which are just grass and card, bins which are slower working and bins which are making very fast, fairly coarse compost for mulching. BUT I have lots of space and a professional interest in compost! (and am a touch obsessed about compost, I grant you.....)
BUT it doesn't really matter what you make compost in! As long as there is air, water and the right mix of compostable material it will produce compost ...eventually
So...this is how I make compost....
Site your bin or heap in a not too sunny or shady place if possible. If you can, put the bin on the ground. It will still work if you have to put it on concrete, though.
Choose a place where you can easily add ingredients to the bin and get the compost out.
Composting requires a roughly 50 :50 mix of of green sappy stuff ( which is high in nitrogen) and brown, papery stuff ( which is high in carbon). Before you start to fill your bin, try to build up a good collection of "green" and "brown" material if you can, the more you put in a bin at once, the hotter and faster it will work.
In this set of photos, we have just finished cutting down all the spent daffodils and pulling up nettles in the garden so I had LOADS of material waiting to be composted. I also had a collection of old cardboard waiting to be mixed in with the green stuff....It really REALLY helps to build up a collection of "green" stuff and "brown" stuff when filling your bins, as a full bin works more efficiently and composts quicker and hotter, thus killing off any seeds as well.
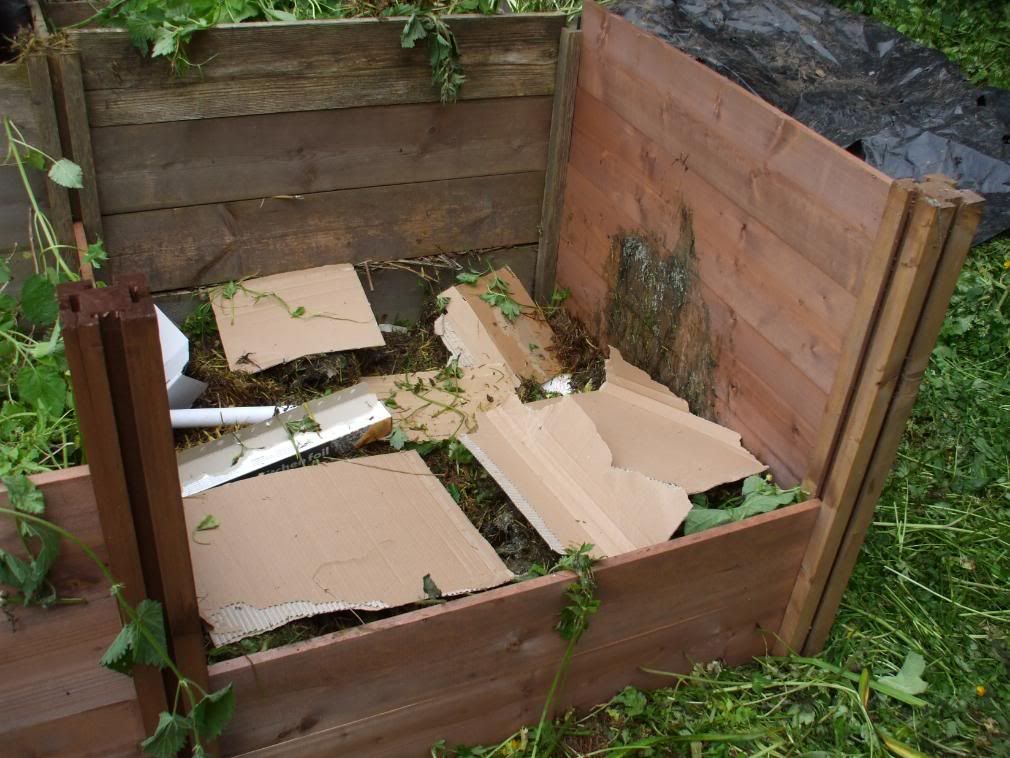
I started off with a layer of well composted bark shreddings from one of the storage bins then added a mix of paper bits and grass clippings. If you are starting a bin in a new area a shovel full of soil is a good idea as it introduces helpful bacteria and other organisms, but it's not essential as I find Mother Nature has an amazing power to sort this out for herself :-)
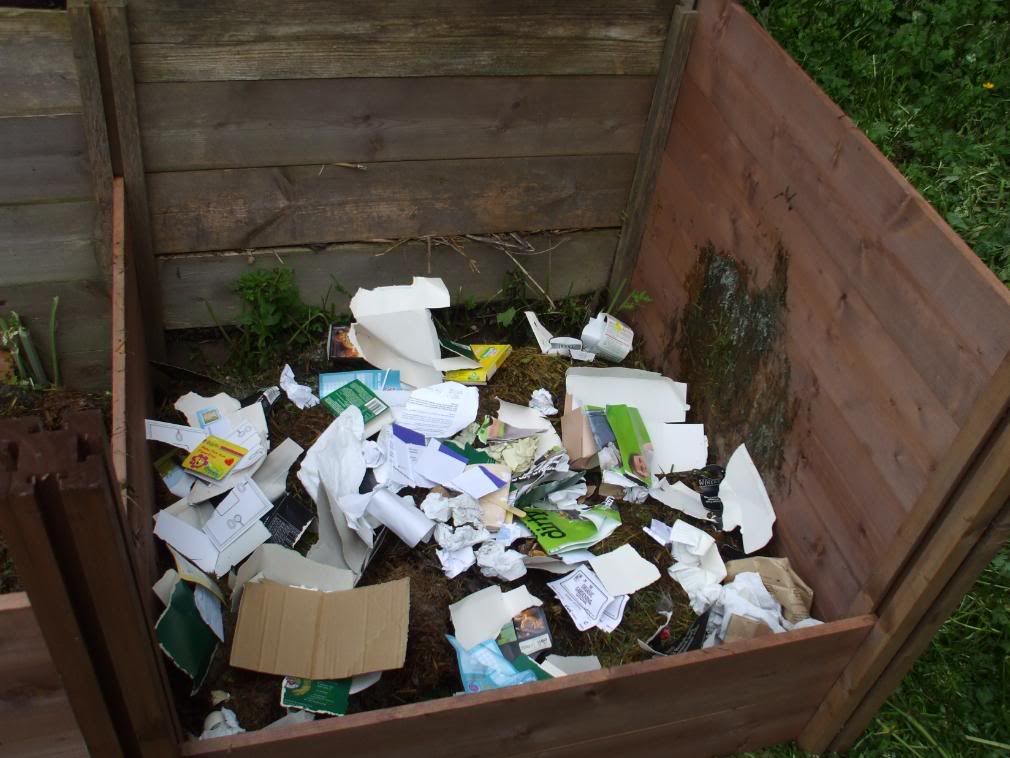
I then added a layer of grass clippings and a layer of very damp cardboard bits on the top. Other green material could be used instead of grass.
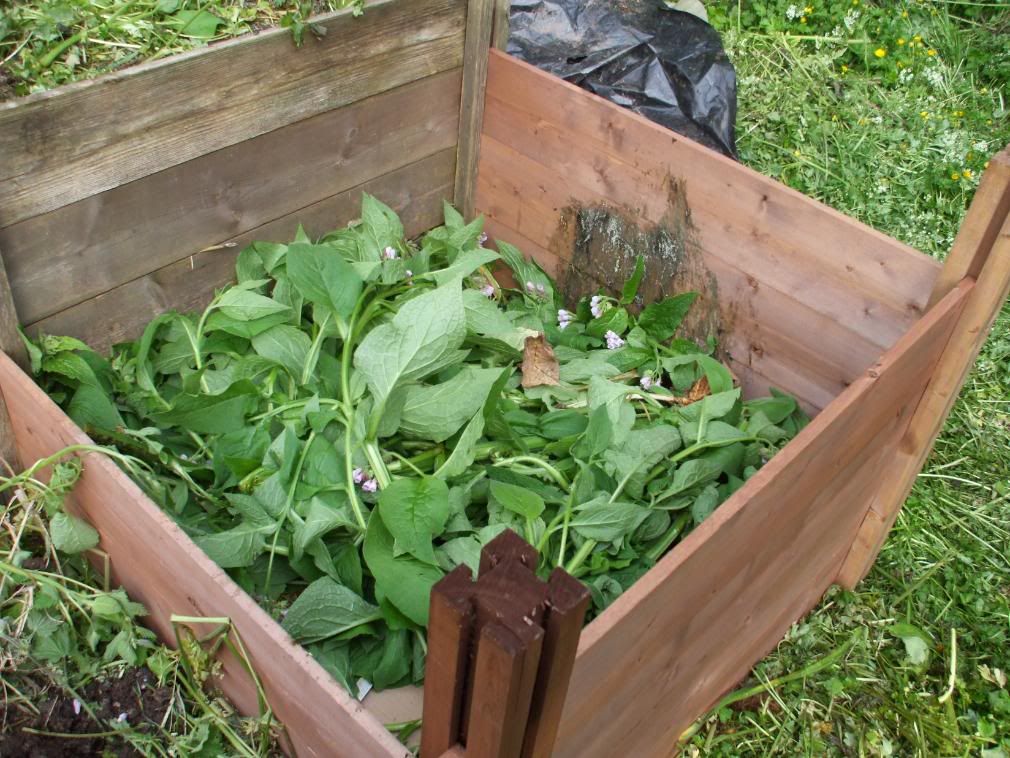
Then a layer of nettles (without the roots- they go in a "weedy " bin to make compost which is only used in the bottom of very deep holes...)and another layer of card on the top....
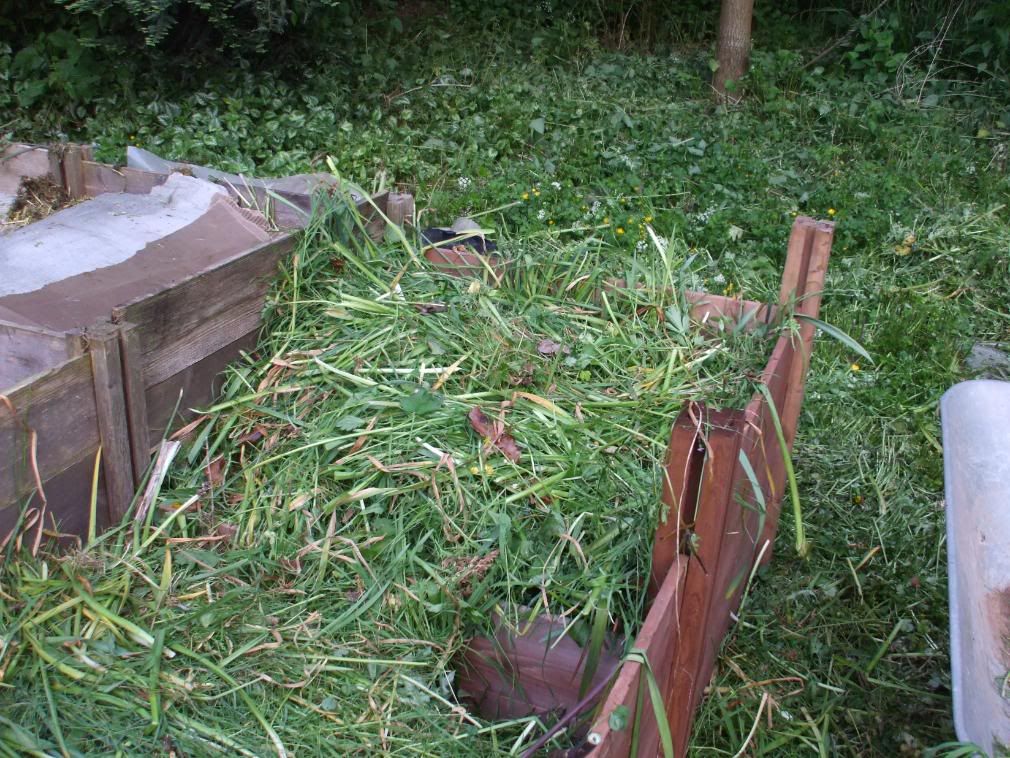
I repeated the layers of green stuff (nettles/comfrey/weeds/grass) and brown stuff (card/paper) until the bins were full to the brim.
The green items contain bacteria which will generate the initial heat that is required by the process. A healthy compost bin is a living ecosystem. By keeping a good mix of green and brown material you will provide the perfect conditions for a variety of fungi, insects and bacteria and can let them get on with all the hard work for you.
This mix will heat up FAST over the next few days, getting up to about 60 degrees centigrade in the middle, and then the material will cool down a little, and slump down. At this point I top the bins up again with alternating levels of green/brown stuff....
If this process is done correctly you don't actually NEED to do any digging out and mixing up (referred to as "turning" in compost speak) to get good compost. The turning process is there to get more air in to your compost material to aid the aerobic (air loving) bacteria in doing their job; but IF you have built the bin correctly, there will be air pockets in it still! you can turn it if you like and it WILL speed things up, but it shouldn't be actually required.
Making compost is really easy...especially if you can get a good pile of stuff together first!
Using this method, in spring and summer I can make acceptable compost in 8 weeks or so. It still needs to be stacked and left for a few more weeks as it is still biologically active and it would be a bit rich for plants "as made", but certainly it has finished composting and can be got out of the bins to make way for more fresh material.
I use the comfrey and nettles I grow (well which grow all over the place by themselves!) and add them to my compost heaps AND make fertiliser teas from them to feed my plants..(BTW Nettles are good BUT always make sure they are of known provenance!...else you might be importing herbicides and we all know where THAT can lead!))
If there is anyone out there who likes peat, well it is perfectly possible to make a good peat free substitute using grass cuttings and cardboard. This is called "Grassboarding" and if it's only grass and cardboard, it makes a wonderful peat like compost....if you have a source of grass and plenty of cardboard this is a very good thing to make. The result can be excellent compost, which is weed-free and does not contain large particles or lumps of material.
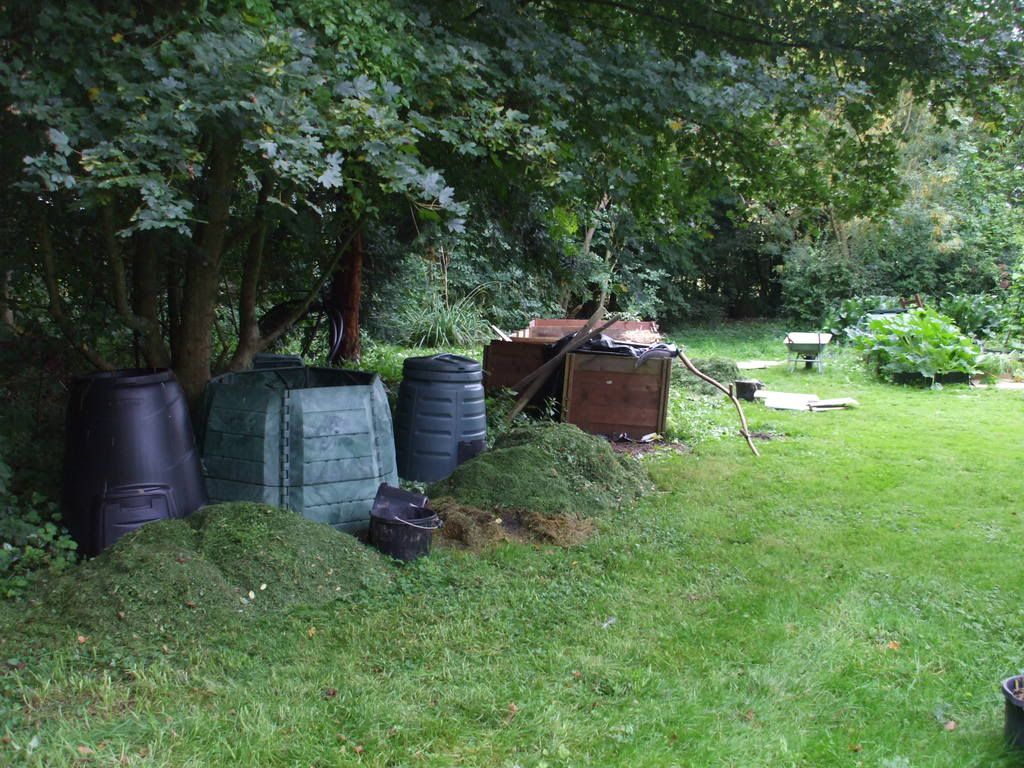
I know I have a lot of space and a lot of compost bins BUT all this will work if you only have one or two compost bins! In the picture at the end, can you see the black "Dalek" type bins? They are 220 l or 330 l capacity, and they make wonderful compost! And the "cold/cool" compost method works really well, it just takes longer and you may get the odd weed seed growing in it, so make sure you keep out any nasty weed seed heads you con't want carrying on. I am not soing anything differently here, to what I would do if I only had one or two bins, honest :-)
Compostwoman's top tips to maximise compost making!
To get the ideal compost mix you will roughly need a 50:50 mix
of both "green" and "brown" material in your bin.
I keep a few "browns" bins in the house which I use for all the little bitty bits of card, paper, tissue etc which is too scrappy to recycle, as well as a caddy for peelings, tea bags, coffee filters etc ec in the kitchen.

I am always on the lookout for cardboard sheets, from shops or from Freecycle.
I stockpile various weeds and prunings and grass cuttings from the lawns, until I have a good quantity of raw materials to fill up the compost bins.
By composting everything and anything available it is possible to dramatically increase the amount of compost you produce.
‘GREENS’
● Fruit scraps (including citrus peel)
● Vegetable peelings
● Tea bags
● Old flowers
● Spent bedding plants
● Rhubarb leaves
● Comfrey leaves
● Nettles
● Young annual weeds (e.g. chickweed and speedwell)
● Pond algae and seaweed (in moderation)
● Coffee grounds and filter paper
● Grass cuttings
● Manure (horse, cow, pig, sheep, goat, chicken, rabbit – not too much as could become too wet)
Human urine is a very good activator!
‘BROWNS’
● Tissues, paper towels and napkins (unless they have been in contact with
meat or disease)
● Tumble dryer lint (from natural fibre clothes)
● Old natural fibre clothes (e.g. woolly jumpers or cotton t-shirts
– make sure you cut them into small pieces)
● Vacuum bag contents(as long as you have natural fibre carpets)
● Garden prunings
● Toilet and kitchen roll tubes,
● Woody clippings
● Dry leaves, twigs and hedge clippings
● Human and pet hair (slow to break down)
● Cotton threads/String(made from natural fibres)
● Feathers
● Wool
● Newspaper(scrunched up)
● Shredded confidential documents
● Straw and hay
● Vegetarian pet bedding
● Ashes from wood,paper, or lumpwood charcoal
● Sawdust and wood chippings
● Corn cobs and stalks
● Cereal boxes
● Corrugated cardboard packaging (scrunched up in small amounts)
● Pine needles and cones (although slow to compost don’t put too much in)
● Egg shells (but crush them first to speed up composting)
● Egg boxes (good as they trap air)
Paper and card is usually printed with fairly harmless inks now (in the UK at least) and I certainly don't worry too much about that, as anything in there is well diluted and a lot of inks are ( I understand) vegetable based now, with the glossinesss being from clay particles. But if you are worried, perhaps steer clear of very glossy magazines? They can go in the recycling bin
When the various ingredients you have put in your container or heap have turned into a dark brown, earthy smelling material, the composting process is complete. It is best left for a month or two to 'mature' before it is used as it is a bit biologically active to apply to plants straight away. Don't worry if your compost is not fine and crumbly. Even if it is lumpy or sticky with bits of twig and eggshell in it, it is still quite usable. It can always be sieved before using if you want. Any large bits can be put back into your new compost heap.
I hope this has been helpful, I shall talk in the next post about removing and using your compost and also how to make leaf mould.
Happy Composting!
Thankyou sooo... much for this post! It is very detailed and I do feel I could give it a try. Presently I have a worm farm to dispose of kitchen scraps, but now I can see how much more there is to improve my soil and stop waste. Here's one convert!
ReplyDeleteAussie!
A good sign that it is too dry is the presence of ants in the mixture.Ah ha!
ReplyDeleteThanks Compostwoman, my heap is obviously too dry. Much obliged!
Thank you so much for a very comprehensive post. The first year I made compost it worked, the second year I'm still waiting for it. Mind you having told dh that he could put sawdust in I didn't appreciate exactly how much he was putting in. Now having read your post I think I may just empty my four daleks - possibly move them - and remix everything. So thank you again.
ReplyDeleteWhata brilliant and VERY useful post. Thank you.
ReplyDeleteSue xx
Excellent post! I love finding posts that make compost sound easy - which it is! I live in a medium-sized city on a fairly small lot, and my compost is still great. Readers, you don't have to live in the country to follow Compostwoman's advice. Go for it!
ReplyDelete