As a Master Composter promoting composting in Herefordshire, on behalf of the Council and Garden Organic, I get asked a lot of questions about how to make compost and what to do with it.
So, in honour of it being Compost Awareness Week, I am going to post ( again) about composting :-)
So, after my last compost post you should all have an idea how make good compost (assuming you didn't, already :-)) )and all the things you could be putting in to make it work really well....
I removed the wooden slats from one of the bins the other day, to see how my friends the worms and insects and microbes were getting on with composting...and see what I found! Decomposing stuff up the top and then a beautiful layer of freshly made compost all the way down to the bottom of the box. Ah, the magic of compost. Throw in stuff which is waste and get out for free a valuable resource, which you would otherwise have to pay for!
 This is a compostbin filled up in Oct 2008.
But how do you tell when it is ready? And what do you do with it when it is ready in the bin, like this? Well, your compost is ready when it looks dark brown and soil like and smells nice and earthy. It should also be slightly moist and have a crumbly texture.
It probably won't look like the compost (growing medium) you buy in the shops and yours will still maybe have twigs and eggshell in it but don't worry... it's still perfectly good to use and you can simply sieve out any larger bits and return them to your compost bin.
So, dig it out and if you can, leave it to mature for a month or two, as fresh compost can "scorch" soft plants if used immediately.
Your lovely compost is food for your garden and will help improve the soil structure, maintain moisture levels and keep your soils pH balance in check while helping to suppress plant disease. Compost has everything your plants need, including nitrogen, phosphorous and potassium, it improves your soil's condition and your plants and flowers will love it ( and you for giving them it!)
 The compost at the bottom is ready. It looks like soil, smells sweet and has few "bits" left undecomposed in it. There may be egg shells and bits of twig left ( and corks!) but apart from that it has all turned into wonderful, rich compost.
Using your compost in the veg garden
Use about 1 wheelbarrow load per 5 sq m, applied in the spring and summer. Dig it in to the top 15 cms or leave it as a surface mulch. I apply my home made compost at a depth of about 3 cm on the soil but I have lots to spare. I often also put some on the autumn after lifting crops, I then cover with cardboard or geotextile and let the earthworms drag it down into the soil for me.
I also use a generous layer of my home made compost in the bottom of potato and bean trenches.
If you don't have enough compost to do all the veg patch, concentrate on the potato, bean, curcubit and green leafy veg areas. As part of a crop rotation your whole patch will eventually get some compost.
Another experiment in progress! As you know I make a LOT of compost...so I use these raised beds to put it in , grow in it and then at the end of the season put the spent compost on the veg garden and start again with filling the empty raised beds next spring.

SO...this bed has lots of lovely home made compost in it and I am using it to grow early spuds and artichokes in it.
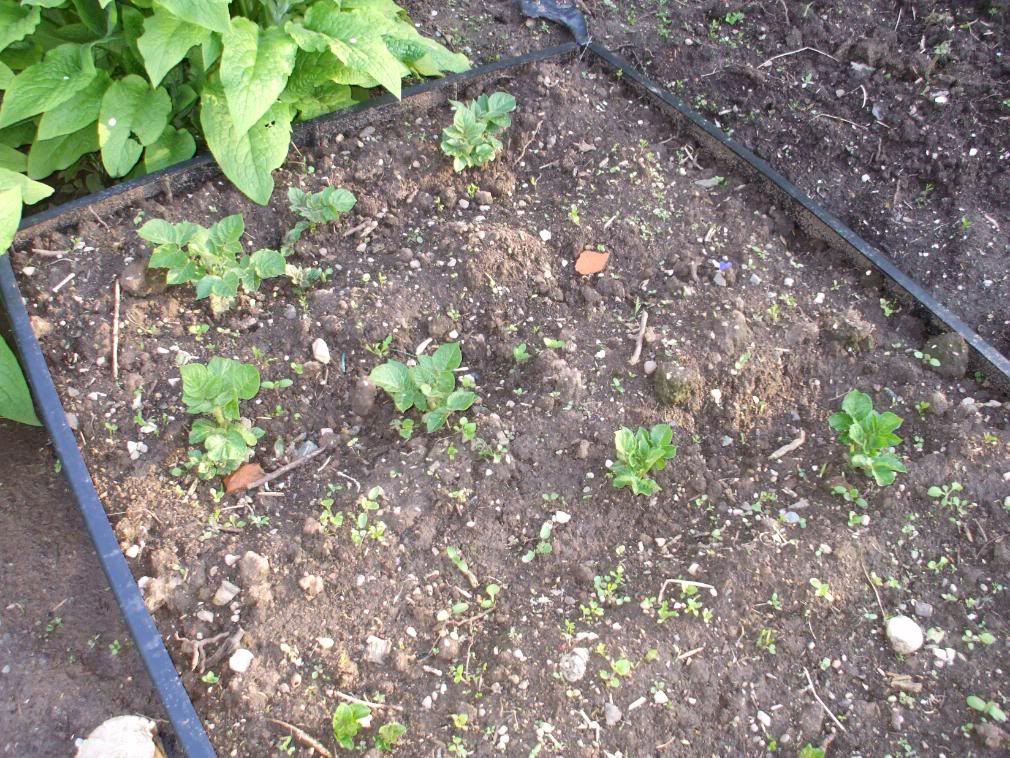
One advantage of doing this is that IF your compost still has weed seeds left, you can see them as they germinate and simply hoe or pull them out....
I also grow the indoor tomatos and peppers and aubergines in large pots standing in trays inside the Polytunnel. The reason being that the polytunnel (erected by the previous owners, not us!) was sited on a load of subsoil and rubble dug out from when the garage was built...so the ground is NOT suitable to grow directly into! Even *I* can't work any kind of miracle with it....
I use builders buckets with holes drilled in the base as large pots and plant into them, it works very well, and then the compost also goes on the veg garden at the end of the growing season.
I now grow exclusively in my own compost, in 2008 I experimented to see if my home made growing medium was as good as commercial peat free potting mix, and I found MY mix gave me earlier and better yields from the same sowings of the same varieties with identical treatment...so this year I am only buying in growing medium to sow seeds into. Once they are plants I will transplant them into my home made growing medium , of compost:loam: sand.
 May 2 2008
 18th May 2008
In addition to making all this compost in bins I use lots of cardboard/paper to cover my plot when the soil is bare, to stop loss of precious nutrients and to provide some organic material as it rots down...I mulch directly with grass cuttings on fallow soil, and plant green manures WHEREVER I can to promote fertility and add humus to the soil.....
Other ideas for using your home made compost.
If you have plants in pots outdoors you could top dress the soil with a layer of home made compost. Take off the top few centimetres of existing soil and add your home compost. Leave a gap around soft stemmed plants. This will give your plants food and is a great way to make them more healthy.
Dressing your lawn with compost helps young grass take root and can make your garden healthier and greener. First, sieve the compost and remove any large twigs or other bits that have not quite broken down. Then mix it with the same amount of sharp sand : compost (to spread it more easily). You will need a layer of about 2.5cm. I use a stiff broom to brush it into the grass. Mature lawns can really benefit from this dose of nutrients but be careful as newly seeded or turfed lawns can be scorched by it.
Compost is great for your fruit trees and they will be very happy if you spread a thick layer of home made compost around the roots of the tree, as will any soft fruit trees. A 5-10cm layer around the roots will provide important nutrients and can protect against drought and disease. Avoid the base of the tree and do not spread too close to the trunk. This will also suppress weeds growing around them. Doing this once or twice a year will help your trees grow taller and bushier.
Using your compost as mulch is a great idea. Use your 'rough' compost (where not everything has completely broken down) over flowerbeds and around shrubs to help prevent soil erosion and replenish nutrients. Use a layer of 5cm, leave a gap around any soft stemmed plants and if you do this after rain or watering, you will help keep the moisture in the soil.
Digging a 10cm layer of compost into the soil prior to planting will help your new plants and flowers bloom. If you have already planted, simply spread a thin layer of compost-enriched soil around the base of the plants. Nutrients will work their way down to the roots. Remember to leave gaps around any soft stemmed plants.
Spread up to a 5cm layer of compost over your boarders to give them a feed! Earthworms will quickly like get to work mixing it in for you, or you can dig your finished compost into the soil prior to planting. Remember to leave gaps around any soft stemmed plants.
So, I hope this has given you some ideas for things to do with your home made compost and you will all be spreading your compost soon. After all just THINK of all the money saved by making your own soil improver and potting mix!
Also, just think of all the waste diverted from going into Landfill if you compost...think of all the Methane which our waste is NOT producing in the Landfill! Methane is 23 times more potent a greenhouse gas than Carbon Dioxide, remember!
And hopefully you will all have even better crops as a result of using your lovely home made compost.
For more ideas on composting, go here, or here,
Happy Composting :-)
Thanks - I have found all this composting info really interesting - I LOVE making compost, but unfortunately don't have all the space you do. I have 2 bins in my garden and 2 at the allotment, plus a builders bag for the overflow. I still don't produce enough compost! I also operate a bokashi system for all my kitchen waste, so don't have to throw much food away, generally only bones.
ReplyDeleteYou have inspired me to empty one of my bins and transport the contents to the allotment ready for my beans etc.
Glad the posts have been of help
ReplyDelete:-)
Like Rachael, I have been able to do only a small amount of compost, as I am not living with a family so as to have the greater amount of organic matter from food. But your posts have inspired me to keep on at it.
ReplyDeleteQuestion, when you leave the compost to mature before putting it on the plants, do you keep it with the still-developing compost, or have a separate pile for that?
Hi, sorry I have a question unrelated to your post, about chickens (again!). One of my girls, Mash, seems to be losing feathers from her underside, looking quite baldy. She seems fine otherwise, eating, drinking, laying, destroying the garden. Any ideas what might be causing it? She's about a year old now, could be a bit of a moult?
ReplyDeleteHmm...could be lice? or feather pecking ...
ReplyDeleteor is she showing signs of being broody? as they pull out their belly feathers.....if she is fluffing up, sitting on the nest and making strange clucks, its broodyness...I have 2 on the go here at the mo!
Or she could be moulting, as you say :-)
Don't think she's broody, she's not sitting on there for any longer than normal. I haven't noticed her preening or pulling at her own feathers excessively. It's in the area right between her legs, so you can't see unless she stands up tall, it's an awkward place to try and get a good look at on my own.
ReplyDeleteCan they moult at any time of year then?
I had incredibly heavy soil when we moved into our home 13 years ago. Now, after ten years of turning home-generated compost into the soil, the garden thrives. I enjoyed your success stories. Of course your home blend generated better growth than the commercial! Well, I am biased.
ReplyDelete